Tuesday, November 23, 2010

Hi to one and all I am so excited to be able to share with you this AMAZING crafter that I have been introduced to and her name is Meg and her blog is amazing! She gave me this great idea that we should blog swap and well I jumped on board! It is always fun to see what fun ideas other fellow crafters come up with. Her idea is so super cute!!!   Well I will let her tell you the rest of the story......

Hello everyone!

I'm thrilled to be here on Beckie's blog today! She has such a fun and happy personality and I'm so excited to swap with her.

I'd like to introduce myself...my name is Meg and I live over at A Little Knick Knack. I'm a midwest stay at home mom with three little, little, little children and crafts have become my sanity! I love to offer fun giveaways to my followers and I also host a link party every Friday called Everything but the Kitchen Sink. Come and join the fun over at A Little Knick Knack!
A Little Knick Knack
Today I'm going to share my burlap "family" sign!

We start with a cheap-o frame (this one was found at Michael's for $3...score!) and take the backing off and glue some burlap onto it. Be careful! The glue will seep through the burlap...I have the burns to prove it!


Here's how I like to glue burlap, to make it even....let's say you start on the left side....after you glue that down, do the opposite side. Then do the top left....then the bottom right and vice versa. The corners fold down nicely after you do all that and the burlap will lay nice and straight.


If you have a Cricut or stamps, then you can skip the next say, 7 steps. :) I don't have a cricut or stamps, so I use my "poor-man's" method. Find a font you like and print it out in bold. Lay the words down how you want them lined up on your burlap....


Now, cut out the black part of your word. Be sure to keep the outline in one piece....


Now, I wasn't able to take pics of the next part, but you apply your paint by using a sponge brush and lightly dabbing the paint on your "stencil." Be sure to push down the sides when you dab your paint, so not to spread your paint out of the stencil lines.


When you try to take your pic, be sure your daughter is done showing you her pretty drawing. (It is pretty good, right? Proud mom moment....)


I had fun adding these fabric flowers to help embellish our "family" sign. There are lots of tutorials over blogland for these and they are really easy! You simply tie a knot at the end of a length of fabric and twist, around the knot, gluing in strategic spots to help it stay put. And, it's that easy folks! If that explanation didn't make any sense, I'm so sorry! Others have done a better job of it out there, I promise!


Here's the final product....


And here it is on my wall!


Another shot for you....like that hand print? Yeah....me, too....


Thanks for having me, Beckie! Have a great day everyone! Happy Thanksgiving!

Monday, November 22, 2010

The Ornament table runner

I love the Holidays especially Christmas!  I love the bright colors and have become obsessed with all the fun shapes of the ornaments!  I mean have you walked into Target lately?  They have all these amazing shapes made of paper hanging from their ceiling and it just makes the place so much more magical!   So I had a BRILLIANT idea to make a table runner using some of my most beloved shapes and designs of my favorite ornaments!
This is what I came up with!  I must admit I love it ~ yes I am a little biased!  But after debating what to do for a week and a half I am pleased with the way it turned out!
First things first....I enlarged a a design that I found at a craft store and fell in love with

Then I cut out a circular oval to go behind it

Next I cut out the third shape of my table runner and pinned onto my fabric and cut out two of those as they are a little bit bigger


                                     Then I cut out my fabric for the front side 14 x 36
Then I positioned onto the runner and used wonder under and cut according to the shapes above and then i ironed on.  Next I used a zigzag stitch for the big ornaments to keep them in place


For the outside of the smaller ornaments I used a  applique stitch to make them look like a more like an oranment and to make it look more polished
Once I sewed on the big ornaments and the small ones on I layed out the table runner


Then I drew on the hooks using a blue maker that washes away with water


Then I put the second piece of the small oranments into place.  Then I ironed them on to the first piece.  Then I sewed them on using a zig zag stitch to keep in place and give it a finished look.
Once all that was done I cut out the binding using some left over green fabric that I had.  I cut it 2 1/2 inches by the width and lenght of the runner. Then I sewed together to make one long piece.  Then i folded in half and in then folded the two sides into the middle and ironed it.  Next I pinned it around the raw edges and sewed it on using a zig zag stitch.


Here is a better picture of the middle


and the side to show the details a little better you can see the zig zag stitch a little better on the big and small oranments.
One thing I forgot to do was to take a picture while I embroidered the hook.  I used a backstitch  stitch and used a metallic silver thread to give it a "realistic" look.


                                                                    Here it is again! 
For the backside I used this fun tree fabric that I had and here it is with the binding on
I hope you like my latest creation!
Happy Holidays

Rectangular Centerpiece

This past week I had the great oppourtunity to make this fun gift for a good friend of mine! She was having a Bridal Shower and rather than the traditional gifts I decided to come up with this!  Not being able to remember if she had a long table I decided to make something that wouldn't take too much space!
So I firsto took and cut out my fabric to size

Then here it is again my fun tree shape.  Yes it is simple shapes using Windows but hey it works so well

Next I pinned onto fabric to cut out

Once positioned I iron on place.  I am telling you Wonderunder is the BEST ever!
Then i sewed on top using a zig zag stitch to hold fabric into place.

Then I pinned on the rick rack to make sure I have it tacked where I want it

Then i add the bottom piece on and sew together

Then I flipped inside out and sewed bottom close  
I added a button on top of the trees for a little something extra and there you go! 
It is as simple as that

Revamping a pillow case

                  This year I decided to add a little flair to my boys Christmas pillowcases. 
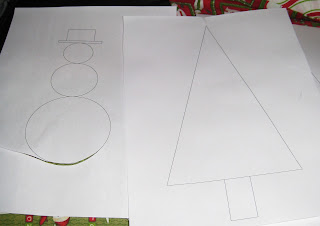
Then I printed off a tree and a snowman as per request of my boys.  Then cut out.  That will be my patterns for the projects.

                                         Once cut out pin onto a piece a felt  and cut out
I pinned a smaller one onto some fabric and cut that out
You can never go wrong with rick rack....I like to use Jumbo with pillowcases

                                                     First I pinned on the rick rack
Then I sewed it on

                                                             using just a straight stitch
Next I positioned on the tree where I wanted it

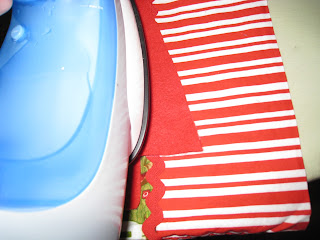
Then I use the iron to iron on
Use wonderunder to help it stay in place and iron on ...it makes it a lot easier...trust me!
For some reason I decied to pin on the second layer and sewed that on

Ta da here is the FINAL piece!

                                                     Doesn't that look so much better?????
                                                     Here is the up close and personal

For the second pillowcase I added some fabric instead of rick rack
 so I first started by tearing off the top
Next I cut some black fabric 2 1/2 inches by width of pillowcase and ironed in half.  Then I inserted it between the top and bottom of pillowcase.  Then sew all three together and flip inside out.
I added the snowman on like I did with the tree

Then I used some left over rick rack for the scarf and sticthed into place.  For the eyes and the buttons I used embroidery floss and did several french knots.
Hope you enjoy!!!